Ten years ago, nobody would have thought that Secure Shell (SSH) connections would work from a Windows-native program. Yet – here we are.
SSH commands communication works just fine inside a Windows' PowerShell window, as OpenSSH has been integrated into Windows 10 back in 2018.
Create a SSH key
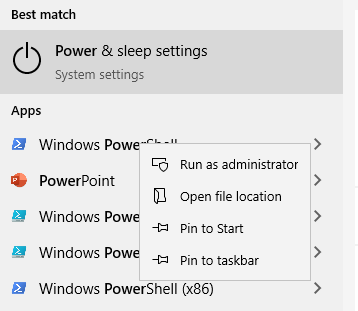
First launch a PowerShell window. Inside PowerShell, run the ssh-keygen command. The -t parameter tells OpenSSH what type of SSH key should be created. Here we go with the rsa type.
PS C:\Users\ck> ssh-keygen -t rsa
Generating public/private rsa key pair.
Enter file in which to save the key (C:\Users\ck/.ssh/id_rsa): [enter]
Created directory 'C:\Users\ck/.ssh'.
Enter passphrase (empty for no passphrase): [enter personal password]
Enter same passphrase again: [enter personal password]
Your identification has been saved in C:\Users\ck/.ssh/id_rsa.
Your public key has been saved in C:\Users\ck/.ssh/id_rsa.pub.
The key fingerprint is:
SHA256:SvV[.......................] ck@DESKTOP-MGFCEDC
They key's randomart image is:
+--- [RSA 3072]----+
|      [...]       |
+----[SHA256]------+
PS C:\Users\ck>
This results in a new folder ".ssh" in your own user folder. Inside this .ssh folder, two files have been created:

The difference between the two is the file extension (which is not shown by default in Windows Explorer).
- The "id_rsa" file without extension is the private key – which you should guard like your own wallet. It should also be password-protected (as prompted in the ssh-keygen command above).
- The "id_rsa.pub" file is the public counterpart of your private key. It needs to be installed on the target server(s) where you want to login using SSH.
Launch SSH agent
A SSH agent is a small program which runs in the background and loads your private key with the password into memory. This allows to use the ssh command without always having to enter the passphrase again.
Note: Pageant is another widely used and well known ssh agent on Windows.
You can check whether the service is already running or not:
PS C:\Users\ck> Get-Service ssh-agent

Status   Name               DisplayName
------   ----               -----------
Stopped  ssh-agent          OpenSSH Authentication Agent
To enable and start the ssh-agent service, open another PowerShell window (run as Administrator):
Then enter the following commands in the Administrator PowerShell window:
PS C:\WINDOWS\system32> Get-Service ssh-agent | Set-Service -StartupType Manual
PS C:\WINDOWS\system32> Get-Service ssh-agent

Status   Name               DisplayName
------   ----               -----------
Stopped  ssh-agent          OpenSSH Authentication Agent


PS C:\WINDOWS\system32> Start-Service ssh-agent
PS C:\WINDOWS\system32> Get-Service ssh-agent

Status   Name               DisplayName
------   ----               -----------
Running  ssh-agent          OpenSSH Authentication Agent
The ssh-agent is now running.
Back in your first PowerShell window (as your own user), use ssh-add to load your own private key into the SSH agent:
PS C:\Users\ck> ssh-add .\.ssh\id_rsa
Enter passphrase for .\ssh\id_rsa: [enter personal password]
Identity added: .\ssh\id_rsa (ck@DESKTOP-MGFEDC)
Install the public key on the remote server
Remember the mentioned public key? Now it is time to look at the contents. Using the Windows Explorer, navigate to your .ssh folder.

Open the id_rsa.pub file with a text editor. Notepad will do. This shows the content of the public key, which is a long line of a text:
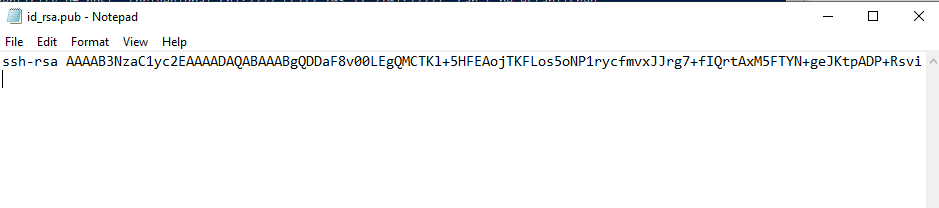
Send this key (or the content) to the server administrator – or if you have access to the server already, place the line into the file ~/.ssh/authorized_keys on the remote server.
Note: ~ stands for user's home folder
Connect to a remote SSH server
Now that we have created a key, enabled ssh agent and placed the public key on the target server, we can initiate a ssh connection:
PS C:\Users\ck> ssh -l ck 192.168.15.20
The authenticity of host '192.168.15.20 (192.168.15.20)' can't be established.
ECDSA key fingerprint is SHA256:+F4MZdFhziAjwqwgM50G8186ef2qMbgEQS+Ri8ciWgo.
Are you sure you want to continue connecting (yes/no/[fingerprint])? yes
Warning: Permanently added '192.168.15.20' (ECDSA) to the list of known hosts.
Last login: Fri Mar 12 16:46:09 2021
ck@mintp ~ $ uname -a
Linux mintp 5.8.0-63-generic #71~20.04.1-Ubuntu SMP Thu Jul 15 17:46:08 UTC 2021 x86_64 x86_64 x86_64 GNU/Linux
The optional -l parameter defines the user on the remote server. This might not always be the same user as you are running on your Windows machine. By using the -l parameter you can define another user name. By default, ssh will assume the same user name as you are currently logged in.
Another often used optional parameter is -p. It defines a different SSH port (default is 22).
If this is the first time you are connecting to a remote server, ssh will prompt you to verify the remote host's fingerprint. You can do so by entering yes at the prompt.


[…] has been a pain for decades. Only in the last few years Microsoft changed their opinion and allowed direct SSH connections in Windows PowerShell. Prior to that solution and still relevant today are the PuTTY […]